Monday, June 14, 2010

Creating Thick Dolly Lashes


The other day, I wanted to dress up for a date, but realized all my thick dolly lashes were used up already! Left a box of very sparse and long lashes for lengthening purpose, which does not really create a big-eye effect. Which is why I left it there untouched for so long.


Then, I suddenly had a bright idea which i got from watching all the taiwanese makeup variety shows. I just cut and paste!! (I used 2 lashes for this)


End Product! Its totally lovessss and exactly the thickness I wanted. The ends are also extra thick.


For both eyes!


Put on some lip plumber and blusher. Btw, that lip plumber doesn't really plump my lips, its just a minty feeling. Feel cheated :/


Oh, I always put some lip balm on my lips before putting on lip gloss/lip stick to prevent it from drying out. Girls, no guys like chapped lips. And its also smoother and easier to apply lipgloss afterwards.


The End~~
Fyi, as some of you might have known, my eyes are really zomfg small, tiny, puny before makeup. So thick lashes is a must to 'open' up my eyes!


ok la enough camwhoring, chio liao la can go out already


Thursday, June 10, 2010

Day out

Girls day out with Hui and Mel. Just a simple lunch date so not much dressing up.
My new bangs is great, mel says i suit bangs.

Decided to wear a simple top with my new obsession, the high waist skirt.


Mine is grey with some polka dots. The tulip designs actually accentuates the butt area and make your thighs slimmer.


For make up its double layered falsies.
Just eyeliner, draw it with a tail so that it can make your eyes bigger.

Paste on the falsies and you are ready to go.


Ready to leave the house.


As usual, taking pics of the girls.


My loots of the day.

Shorts for the casual day out $18. Free belt.
Plus hair clip that is cute to the max with lace trimmings. It's 3 for $10!

Girly but very easy to match.

Thursday, June 3, 2010

Eyeliner, pencil, liquid or gel?


There are like a zillion kinds of eye liner out there, some proclaiming that they are the most powerful, super anti smudge but can be washed off with water. So how? This eyeliner issue must be quite bothersome, for those who wish to get a new eyeliner perhaps this will help you make a decision. Alright, not emphasizing on the brands, we have some samples here.


from top to bottom, right to left:


1) Silky girl cheap cheap eye liner that says made in Mexico


2) 24 Hours water proof real lasting eyeliner (fine prints wrote: helps draw incredibly delicate lines and effectively ensures long hold)


3) Maybelline Impact express with smooth felt liner


4) Suki eyeliner cream


5) Maybelline lasting drama gel eyeliner


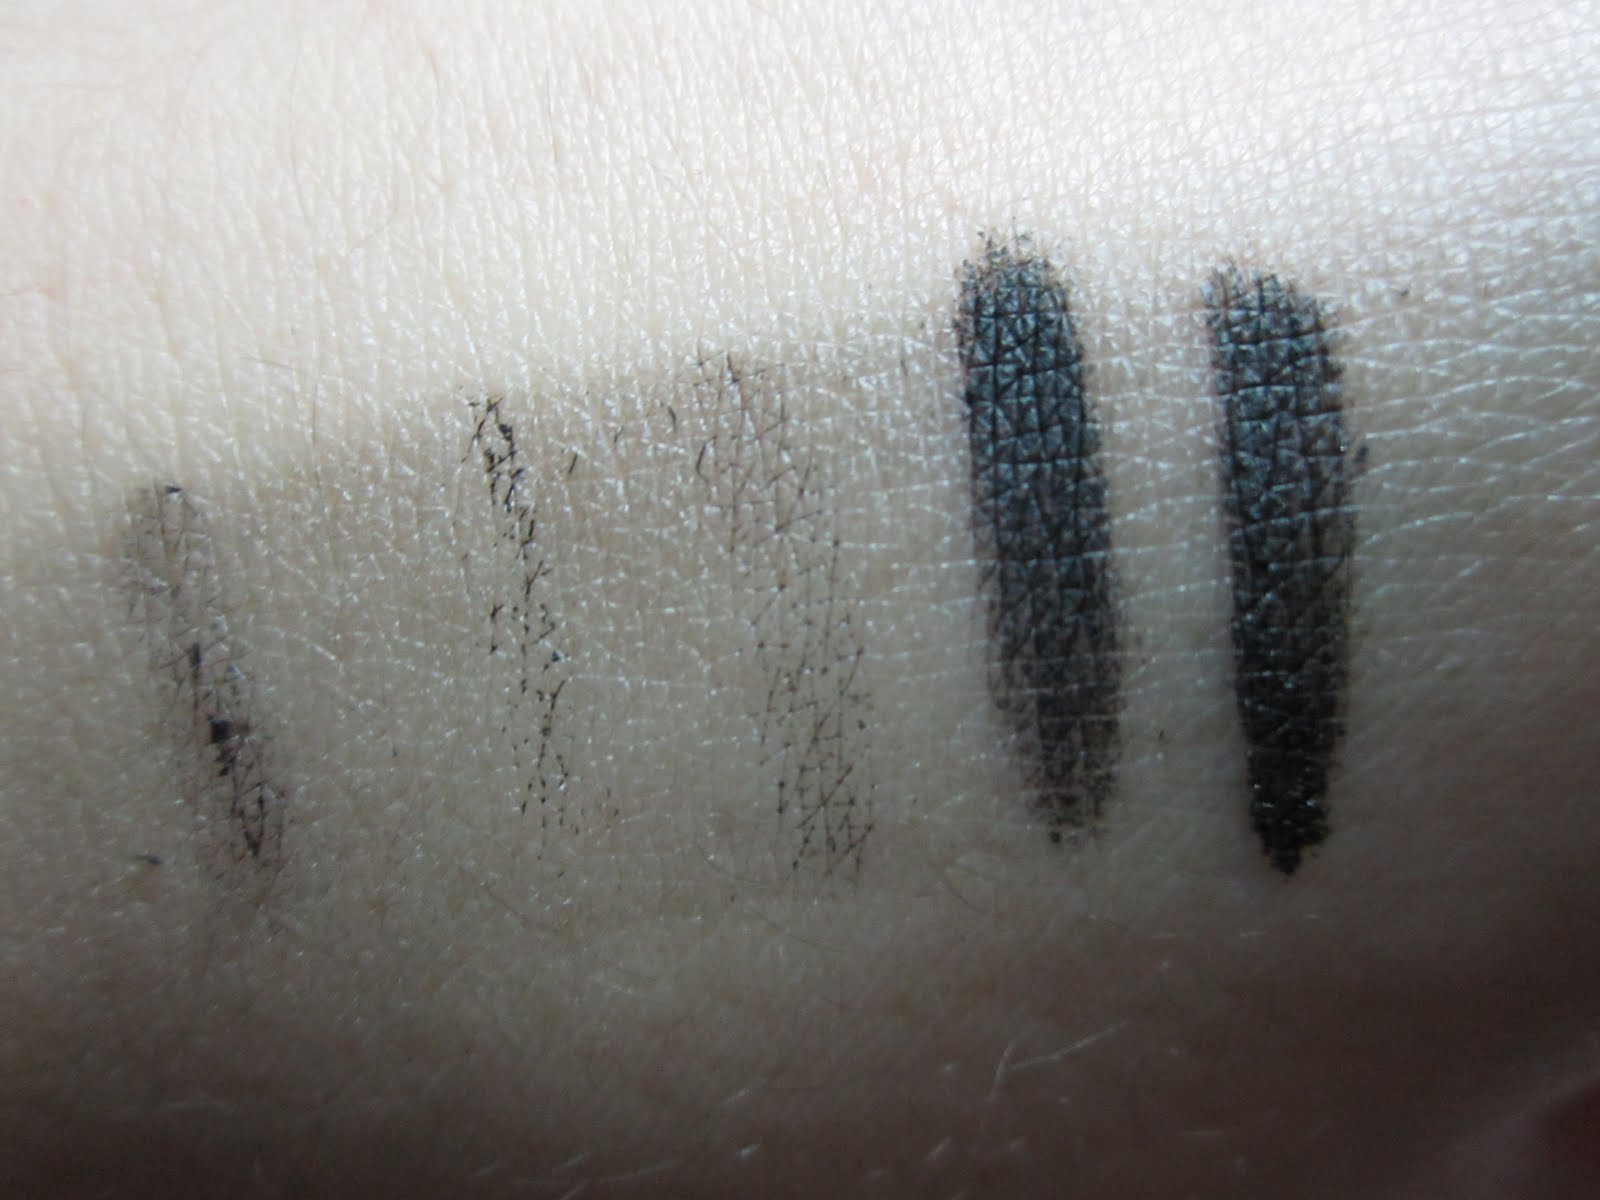
These are the tested spots.


From right to left


1) silky girl


Pigmentation is not dark enough even when the pen was used to draw over the same area a few times. However, edges are smooth and seem to blend well into the skin.


2) Dark and slightly glossy, lines are smooth and sleek with no hairy hairy corners.


3) Thick line was drawn with one stroke, but felt tip was not able to produce thin lines.


4) Slightly smoky corners but the sides weren't definite


5) Dark and black with some glitter that the camera did not capture. lines were fine and easy to scoop up desired amount of liner.


The test begins as the liner were brought under the tap. And given a single stroke of rub.


Results: 2 out of 3 survived the test. 2 gel liner is the winner!

even thought gel liner may withstand the water treatment, it is slightly harder to control as the amount of liner to use varies due to the density of the liner.

Liquid liner may not be water resistant but their thin brush is good for the tails of the eyes.

Pencil liner should be the least desireable as it smudges and does not provide good control of thin lines.

I am a fan of liquid liner actually as it is easy to use, even possible to draw on the bus. So next time while picking up a new eyeliner you can try to check out the gel liner.


Cheers~


Wednesday, June 2, 2010

YY's Hair Care Regime ♥


Hair can make or break a look. With great hair, it also tells how well the person is groomed. Some people are born with naturally silky and smooth locks while unfortunately, due to my constant bleaching, dye-ing, rebonding, my hair has turned into a pile of hay =(


HOWEVER! I have decided not to be lazy, 世界上没有丑女人只有懒女人


I will religiously follow my 4-step hair care regime


I will religiously follow my 4-step hair care regime


I will religiously follow my 4-step hair care regime


Step 1: Shampoo!


This is my fav shampoo. I dunno if its my xin li zhuo yong due to the cute design of the bottle, but my hair just feels softer and squeaky clean at the same time. But the nuance airy, makes my hair poofy and puffy which is not what I really want =/ I want to buy the orange bottle one but its all sold out.


I bought 4 bottles of this shampoo and conditioner at this shop in Chinatown. Because it costs only $7.20! Wayyyyy cheaper than NTUC which is selling at $9.50!!! It also sells all sorts of cosmetics and toiletries at cheaper price. So faster go!


When you alight from Chinatown MRT, exit at People's Park Complex. Turn Left, and you will see a building with a big hawker at the first level. Then take the escalator up to the 3rd floor, you can see a whole lot of shops selling cosmetics and toiletries selling stuff way cheaper than supermarkets. I think the shop i went to is called "Jing Long".


Step 2: Conditioner


Conditioning is super ultra maximum important to me! It keeps my tresses ultra smooth and knot-free. My hair is also less frizzy when it dries.


Step 3: Hair Mask


I'm like an Essential fan or something. This hair mask has 3x ultra honey (btw, what does ultrahoney mean??) and shea butter. It REALLY FEELS LIKE BUTTER!!! It has the same thickness and consistency as butter. I think its a very very condensed hair conditioner with extra goodness like butter and honey. Due to the poofyness after using nuance airy shampoo, this hair mask really helps to nourish and give moisture to my hair.


It is to be used 2-3 times per week. Leaving it on wet hair for 5 mins before rinsing off. 5 mins of waiting time in the shower with nothing to do feels like FOREVER -_- So i guess I might just be using it once per week.


Step 4: Leave In Hair Conditioner- Sunsilk


This leave-in hair conditioner is apparently created by some Jap hair specialist which has special knowledge on how to treat damaged hair. After towel drying my hair, I rub in some leave in hair conditioner for my hair to absorb the moisture and remain silky smooth. However, don't apply too much as you don't want oily hair just after you washed it!


My hair after the 4-step procedure. It is naturally dried, not blow dry

PS: i rebonded about a year ago, i dyed my hair about few weeks ago


SMOOTH~~~~~


Monday, May 31, 2010

3 steps to bigger eyes without the falsies

The make up tutorial 2 is to let all girls who have little experience with fake lashes get the big eye look! By using jus the mascara and eye liner, say goodbye to tiny winy eyes. Using just 3 simple tools we can enlarge those peepers and make them attractive.


Pre- eye make up: apply BB cream, foundation to conceal and hide those flaws :(


I personally use BB cream from Etude house. It has functions of sheer concealing, SPF 30 for the terribly UV rays, and also act as make up base and moisturizer. So many functions for the price of 1. I buy Etude house products from Malaysia as it is abt half the price? Jus at city square quite near.


For foundation, I use laneige.


I bought this from a sale, laneige private sale. The packaging for this foundation is different from those selling over the counter. And that was precisely why it was on sale. Because they decided to change the packaging. It was selling at $20. Refills at $10. Dirt cheap. The powder pigments are tiny and barely seen when swiped across the face. Plus some added shimmer will bring out your features and not make you look like u jus slapped on some flour.


So, the regime begins.


Step 1: This is my eye without any make up. Use a eyeliner and draw a line above your lashes as near as possible.


Draw it slighly out of your eyes and end with a small triangle. Make sure the triangle points upwards.


For me i use K palette 24 hours eye liner. Recommended by Miss Yu Ying. The eye liner has thin tip for beginners and is smooth and quick dry. No need to stand in front of fan to blow dry. Plus, no smudging the whole day!


Step 2: Use a black eye shadow to go over the eye liner for a more natural look plus, this prevents smudges as the powder can absorb some oil from your eyelids. Line the lower lashes as well with the shadow, but take note to only start half way thru your eyes. If you were to line the entire bottom lash you will end up with smaller eyes.


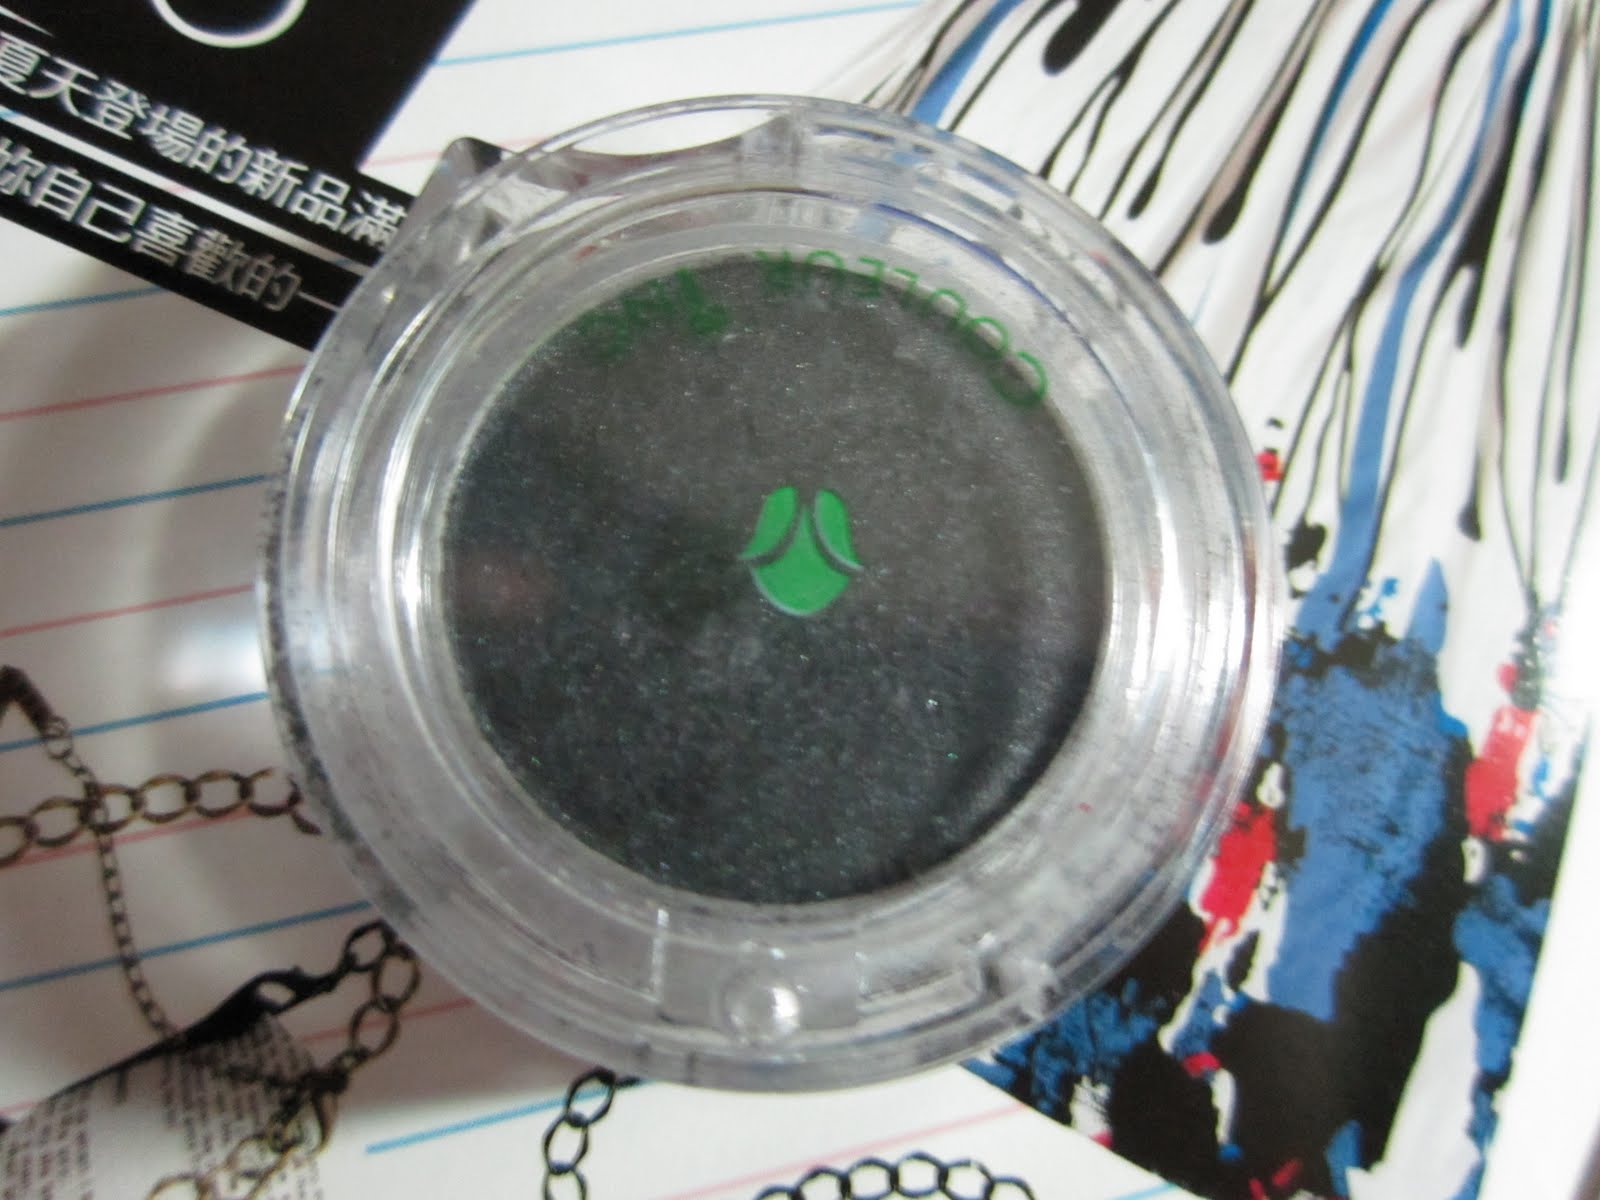
I personally use Couleur. Its actually very cheap in many departmental stores even though its made in japan. This eye shadow has some shimmer so it looks good even if you are hitting the clubs.


Step 3: Finally prim your lashes and apply mascara. wait for the first coat to dry and repeat for 2476497 times till you get the desired volume and length.


That's all! 3 steps.


Complete your make up with a blusher and you are ready to go!


A sneak peak to my latest hoots from Blythe Zoo Taiwan online shop. Featuring the latest light denim which is currently the hottest in Japan! Perfect combi for the hot weather. The stripes of black and white adds on some character as well.


Saturday, May 29, 2010

Blueberry Muffins ♥


Blueberry Muffins


Miss Yu Ying was quite free at home so she decided to do some baking!


I did not use the full amount of ingredients as stated below as I wanna test test first so I cut all the quantity into half.


The Recipe:


10 Easy Steps!


1. Butter: 500g

2. Sugar: 400g

Mix Butter and Sugar with beater till fluffy and white


3. Milk: 100ml- Warm to room temp

4. Vanilla Essence- 1 tsp- Mix with milk

5. Eggs: 9 pcs- Add in slowly one by one


6. Cake Flour: 375g

7. Baking Powder: 10g

8: Custard Powder: 50g

Sieve all 3 together and fold slowly

To fold slowly means to stir in the flour in a figure of 8. This method is often used in baking.


9. Blueberry Filling (Sweetened)

Pipe mixture into pans

Fill only to half

Add a small layer of fillings

Fill to top with the rest of the mixture


10. Cook for 25 mins at 180-100 deg till golden brown


Below are pictures of the process:


Preparing......


-I substituted butter with sunflower oil. Healthier choice!

Erm actually its because there is no more butter at home :(


-I have no custard powder too and did not want to buy a whole tin, so I Googled for substitutes and look what I found! http://www.cheftalk.com/forum/thread/18350/custard-powder

Can substitute it for corn flour + vanilla essence!! :D


- I substituted baking blueberries with blueberry jam :D Cos super hard to find baking blueberries. Brilliant idea! It works just as well


This is the jam I used ($5 from NTUC).

Its quite good, its made with 100% wild blueberries with no added sugar, its fill to the brim with blueberries!


Mixing the oil and sugar. SUPER hard to dissolve the sugar. (To make this step easier, use fine sugar) I was too lazy to use the electric beater cos very troublesome and oily to wash after using it, so I used the manual whisk. I think i grew muscles after whisking it


Whisking it like mad.....


Ok I give up, I put it on the stove to dissolve it.


After adding everything its a little bit of watery consistency so don't worry.


Time to pour into muffin cups! Look at the amount of blueberry goodness inside the jar.....


Done! I don't have enough muffin tins so I used a cup and egg tart trays -_-

(After trying the ones in egg tart trays, I realise those in egg tart trays are abit dry, compared to the ones in cups, I think the mix is thinner, so it gets cooked more easily, so use cups!! Don't use flat trays!)


Preheating the oven for 10 mins at 180 Deg......


Done!


Now you can share it with all your loved ones~~

Its super moist and zomg YUMMEH!!!!


This muffin is saying "Pls don't eat me!"


Lol.